Happy Halloween!

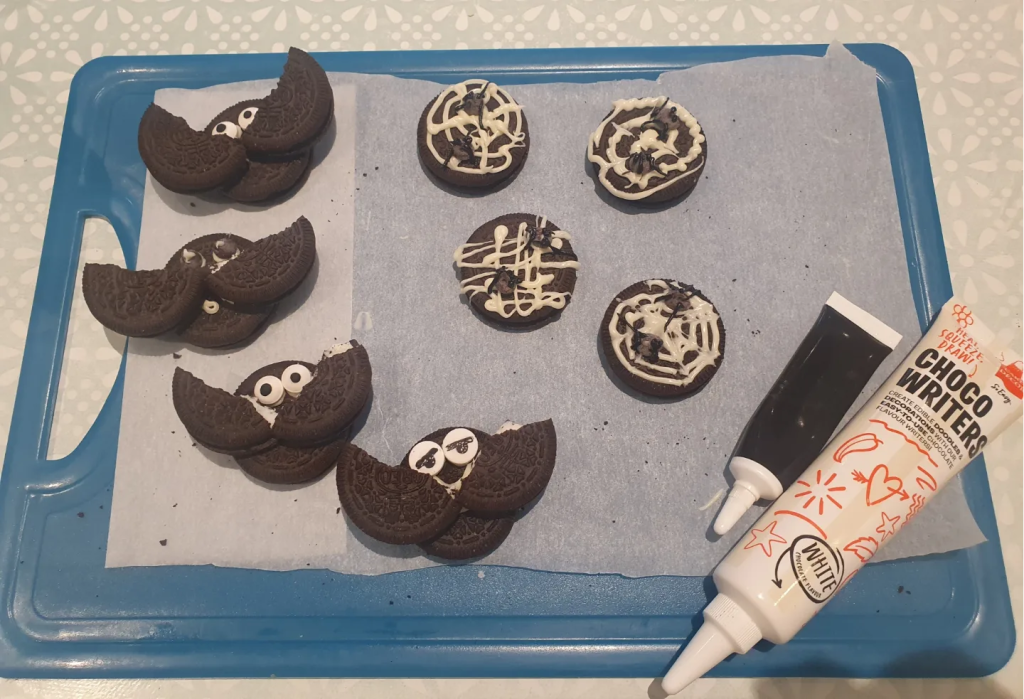
On insta, I have seen so many creative recipes for Halloween! So, today as I had to work and will be late coming home! I thought I would make a nice suprise sweet treat for my boys when they come back from school! I needed something super quick and the boys love oreos so I made some bats with them and spider designs!

All you need is 2 oreos per bat, break one in half and stick them down with white chocolate or icing as the wings, add some candy eyes. For the spider web, I drizzled the white chocolate and added a chocolate chip for the spider body and black icing for the legs!!

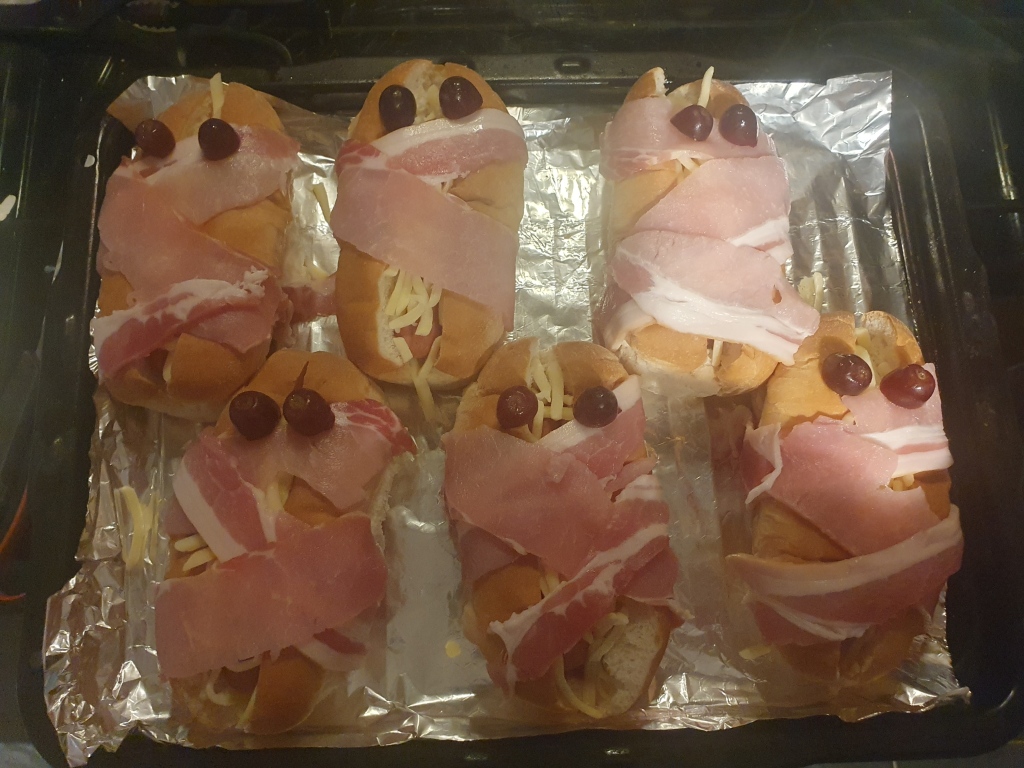
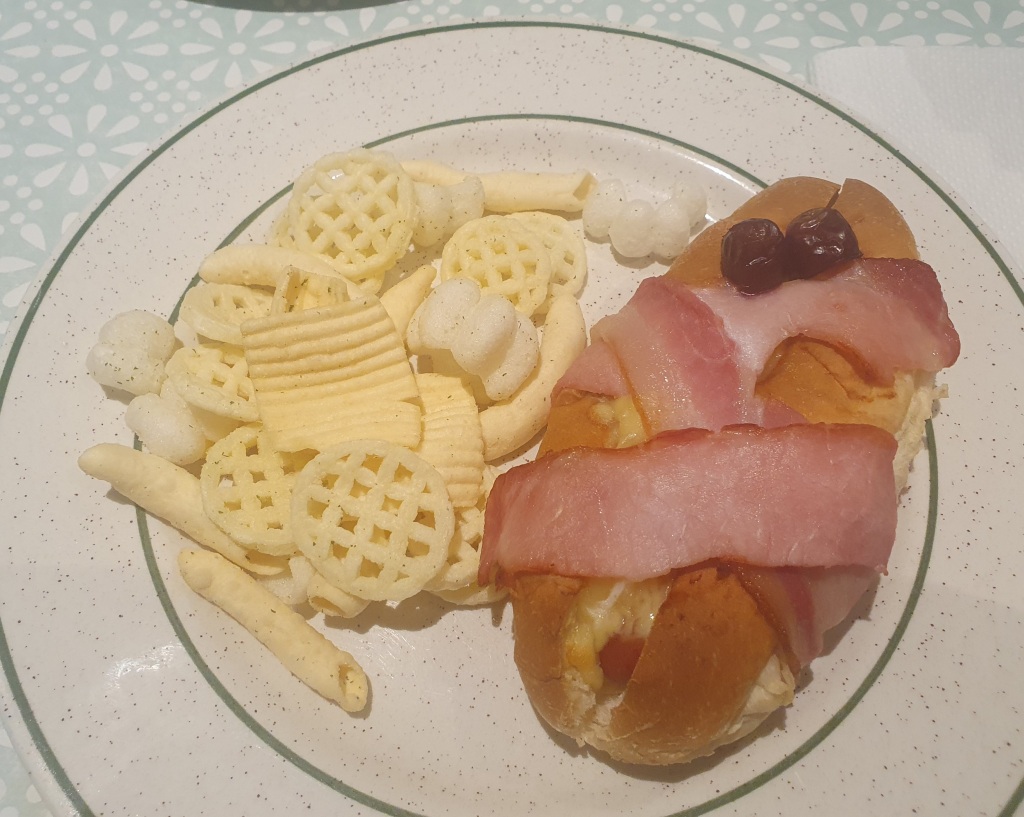
For our dinner, I made hot dog mummies as I saw this recipe post from Warburton. So simple to make and delicious! I will be making this again! In the hot dog bun, add some ketchup, grated cheese, hot dog from the tinned/jar, add more cheese and wrap it around with the bacon to make it look like a mummy. You can use olives for the eyes, I didn’t have any at home so I used some grapes! Put them in the oven for 20 – 25 minutes GM6 and enjoy!

Pandan Loaf Cake

I recently bought some pandan extract from a Chinese grocery store. I found this recipe from the Decorated Treats blog and I didn’t fancy making a pandan chiffon cake as I find that process quite complicated! If you have never had pandan flavour before, it has a vanilla and flowery taste. This recipe is a pound cake so the method is really easy and it tastes delicious! I have already made this cake twice!!

Ingredients – 180g salted butter, 180g granulated sugar, 180g Self-raising flour, 3 x eggs, 3 x tbsp milk, half tsp of baking powder, pinch of salt, 1 tsp pandan extract. Optional – green food colouring.

Method:

  1. Preheat oven to GM3 and line your loaf cake tin. Cream the butter and sugar until light and fluffy into your mixer.
  2. Beat in the eggs, one at a time. Sift the flour, baking powder and salt and mix this into the creamed mixture in 3 batches. Alternate each batch of flour with milk, starting and ending with flour.
  3. Add the pandan extract and if your extract is white, add some green food flavouring. Mix until well combined.
  4. Pour the batter into your loaf tin and smooth it at the top. Bake for 40 minutes or until the cake is ready (no wet batter sticking to the skewer to check). Leave it in the tin for 5 minutes and turn it out onto a wire rack to cool completely. Enjoy!

Cinnamon Sugar Bread Crust Treats

When we made the TikTok toasted chocolate pancakes, I found that there was a lot of wastage of bread and I was really reluctant to throw it away. So, I did some research and came across recipetineats.com ‘s blog and saw her ‘Cinnamon Sugar Bread Crust Treats’ recipe. Such a great idea as it only takes 10 minutes to prepare and the outcome is super addictive to eat!

Now, I am just saving all my hard bread in the freezer so that I can use it to make this treat again. It is definitely a favorite recipe in our household! If you don’t have enough crusts, you can use leftover bread and cut it into stick pieces.

Ingredients: 6 cups of stale bread crusts or enough for 1 – 2 trays, 60g of melted butter, 3 x tbsp sugar, extra sugar to sprinkle on top once baked, and 1 tsp of cinnamon.

Method:

  1. Preheat oven to GM4 and line your trays. Cut the bread/crusts into 3cm pieces.
  2. Place them in a large bowl and drizzle in the butter and coat it evenly.
  3. Sprinkle the sugar and cinnamon and toss through. Spread them onto the baking trays.
  4. Bake for 5 – 8 minutes until golden brown and crunchy.
  5. Whilst still hot, sprinkle over the remaining sugar and enjoy!

Toasted Chocolate Pancakes!

My boys came me the other week and said they wanted to try out this new TikTok recipe that they saw on YouTube – toasted chocolate pancakes! They showed me the clip and I thought, ok, let’s try it out! They were super excited as it is something that they can make themselves and it’s quite fun! 🙂

So basically, you have 2 pieces of bread and you add your Kinder chocolate (3-4 pieces), I used another brand as that’s what I have got at home. Then, you use a glass and cut out a circle. Press the edges together so that it is sealed and pop in your toaster for a few mins!

I didn’t think it would work as I was worried that the chocolate would leak everywhere but it was contained! And, it tasted really nice so I was pleasantly surprised! Doesn’t take long to prep this and it’s fun for the kids to make! However, I did tell the boys, they can’t be having this every weekend, once in a while! 😛

Celebration Coronation Fudge

It’s the Coronation of King Charles III this weekend and I made some Coronation Celebration Fudge for my afterschool clubs kids for their treat! It was my 1st time making fudge and I was really surprised how simple it was to make with only a few ingredients!

All you need is 4 ingredients – White Chocolate – 400g, Condensed Milk tin – 397g, Vanilla Extract – 1 x tsp, and Sprinkles! I spotted this recipe from Eats Amazing blog and I have adjusted her recipe slightly as I didn’t have enough white chocolate at home and it still worked! It is a really quick treat to make of you want to take it to parties or give away!

All you have to do is line a tin with baking paper, melt the white chocolate & condensed milk, and add the vanilla extract either using a double boiler method or microwave. Mix it altogether and pour the mixture into your tin, make it smooth and then add your sprinkles on top. Pop it into the fridge to set for at least 2 hours or overnight. Once the fudge is hard, use a sharp knife and cut it into little pieces. I brought some coronation sprinkles from Asda so it has patriotic red, white, and blue colours. Looks really colourful and effective against the white fudge!

The fudge is delicious, and very sweet so you should cut it into little pieces as it is very morish and calorific!! Lol! I managed to cut 30 pieces using my 8 x 8-inch tin!!! Enjoy the coronation celebrations! 🙂

Giant White Chocolate Rainbow Jazzies

I was looking for inspiration of making some treats for the kids in my Kiddy Cook Class to celebrate the end of term. And, I came across this blog – Eats Amazing which has a huge selection of recipes that you can make with your kids and is very family orientated. I love her blog so I will definitely be trying out some more recipes.

I needed to make something that was quick and in a large batch as I had to make 36 of them! I didn’t fancy being in the kitchen all day! Lol! The giant white chocolate rainbow jazzies is a great recipe, so simple and cheap aswell!

Ingredients: 200g/300g White Chocolate and Sprinkles of your choice

Method:

  1. Melt the white chocolate in the microwave at 30 seconds intervals and stir it until all is melted.
  2. Spoon the melted chocolate into the silicone cups. I used a cupcake tin and inserted the silicone cup so that it holds its shape. In the original recipe, it uses 200g of white chocolate but I think it needed abit more as mine came out really thin so I would melt more chocolate next time.
  3. Once you have filled all your silicone cups (12), tap the tray to get rid of the air bubbles. Then, generously add your sprinkle of choice. I used some heart ones because it was near Valentine’s. You can always theme your sprinkles on the occasion, ie Easter – yellow and green, pale colours, Holloween would be black, orange, green etc. It is totally up to you!
  4. Put them in the fridge for 30 minutes to set and then pop them out of the silicone cases. If you are giving them as a gift, you can wrap them up in cellophane bags with a ribbon. You can store these in the fridge or somewhere cool.

Pancake Day 2023

It’s pancake day today! I have a super easy recipe that you can make with your kids, the texture is like the American pancakes, soft and fluffy!

Ingredients:

1 egg, 1/3 cup of plain flour, 1/2 tsp baking powder, 1 tsp vanilla extract, a pinch of salt, 45ml milk, and 1 tsp butter & 1/2 tbsp oil for frying.

Suggestions for toppings – Maple Syrup with berry fruits, Nutella and banana, ice cream and sprinkles or the classic flavor – lemon, and sugar!

Method:

  1. Separate the egg, putting the white and yolk in separate bowls. Mix the egg yolk with the flour, baking powder, vanilla extract, and milk to make a smooth paste.
  2. Beat the egg white and a pinch of salt with an electric whisk or by hand until fluffy and holding its shape. Gently fold the egg white into the yolk mixture. Be careful not to knock out any of the air.
  3. Heat the butter and oil in a non-stick frying pan. Dollop a third of the mixture into the pan and cook on each for 1-2 mins or until golden brown. You can make about 3 pancakes or you can make 1 big one! Enjoy!

Valentine Chocolate Bliss Balls

It’s Valentine’s Day next Tuesday so you can make a batch of chocolate bliss balls! So simple to make and you can always coat them in chocolate once you have made the balls and put them in the fridge to set and then add your sprinkles to them. My boys loves this recipe with desiccated coconut as their favourite topping!

Ingredients: This mixture makes approx 28 balls.

  • 6 x Tbsp Date Paste
  • 1 – 2 x Tbsp coconut butter
  • 5 – 6 x Tbsp oat flour
  • 2 x Tbsp Cocoa
  • 2 x Tbsp icing sugar

Different Toppings Suggestions: Desiccated coconut, drinking chocolate powder, freeze-dried blueberry/strawberry powder, mixed seeds, chia seeds, the list is endless!

Method – Mix the dates paste with the coconut butter so that it is abit softer, then add the oat flour, icing sugar, and lastly the cocoa butter. You will need to use your hands to make the truffle mix and split it into small balls. If the mixture is too dry, add more coconut butter, if it is too wet, add more oat flour. The texture should be semi-firm but still soft enough to stick the toppings on. With your small balls, roll them into the toppings of your choice and then place them in your fridge to set (1 – 2 hours) and then enjoy!

Baked Blueberry Cheesecake – Gemma Stafford

I was super excited to receive Gemma Stafford’s Bigger Bolder Baking cookbook as one of my Xmas presents as I have been following her blog and podcast since last year! For one of our family gatherings in Jan, I wanted to make something special for our dessert and I haven’t made a baked cheesecake in years as I have always made the chilled one!

She is based in America and for her cheesecake base, she uses ‘Graham Crackers’, I used digestive biscuits instead and I have made a few adjustments to her recipe. This was really easy to make and it was super rich and delicious! The blueberry cheesecake turned out much bigger than I expected, I thought it was going to come out of my tin when it was baking! lol! The texture is very much like the New York Cheesecake, very smooth and creamy! Really yummy and indulgent! A special bake for a party/friends/family gathering!

Ingredients:

  • 200g digestive biscuit crumbs
  • 85g melted butter
  • 3 x 250g tubs of cream cheese softened
  • 200g sugar
  • 1 x tbsp vanilla extract
  • Grated zest of 1 lemon and juice
  • 5 x eggs
  • 35g plain flour
  • 200g blueberries
  • Whipped cream for serving (optional)

Method:

  1. Preheat the oven to GM4 – 180 degrees
  2. In a medium bowl, mix the cookie crumbs and butter and press into a 9 -inch springform pan. Chill for 30 minutes to set.
  3. Use your stand mixer, beat the cream cheese and sugar on high speed until smooth. Add the vanilla, lemon zest and juice and beat until combined.
  4. Add the eggs, one at a time, mixing each until fully blended. Add the flour and fold in the blueberries.
  5. Pour the mixture on top of your cookie base and bake for 1 hour and 40 minutes or until the cheesecake is set but still jiggles slightly in the middle. If the top is getting too brown, cover with foil. Leave to cook completely and then put it in your fridge for a few hours to firm up. You can serve this with whipped cream. Store in the fridge, covered, for up to 4 days.

Homemade Vanilla Extract

I always use Vanilla Extract in my bakes and sometimes even when the recipe doesn’t list it, I would still add 1 teaspoon. In my cupboards, I tend to have several bottles of vanilla extract, I never understand why they don’t sell it in a big bottle!

Last August, I saw on Gemma’s blog that you can make homemade vanilla extract with just 2 ingredients! I thought it was a complicated process but when I read her blog post, it couldn’t be simpler! I was amazed how easy this was to make, it is just a matter of really waiting for the vanilla pods to be absorbed. You can visit her blog as she gives you methods of how you make other flavoured extracts.

All you need to buy is a probably 5- 6 vanilla pods, split them in the middle to open up the seeds and then get a bottle with a tight cap/lid and pour the vodka in! It will be a clear mixture but as the weeks goes by, you will see the colour change and it will be a nice brown colour! Shake the bottle a few times during the week to mix it and the vanilla extract will be ready to used to in about 6 week’s time! I was really surprised that it was made of vodka!! My vanilla extract is now ready to use so I can’t wait to try the flavour!

After 8 weeks, I tried it and you can definitely still taste the vodka which was pretty strong! I thought how can this be used to bake but found online that the alcohol would just burn off when the mixture is being baked. So, I tried this with my favorite banana cake recipe and it’s true, you can’t taste the vodka!! The cake was delicious! Can’t believe I made my own vanilla extract with vodka!!