Pandan Loaf Cake

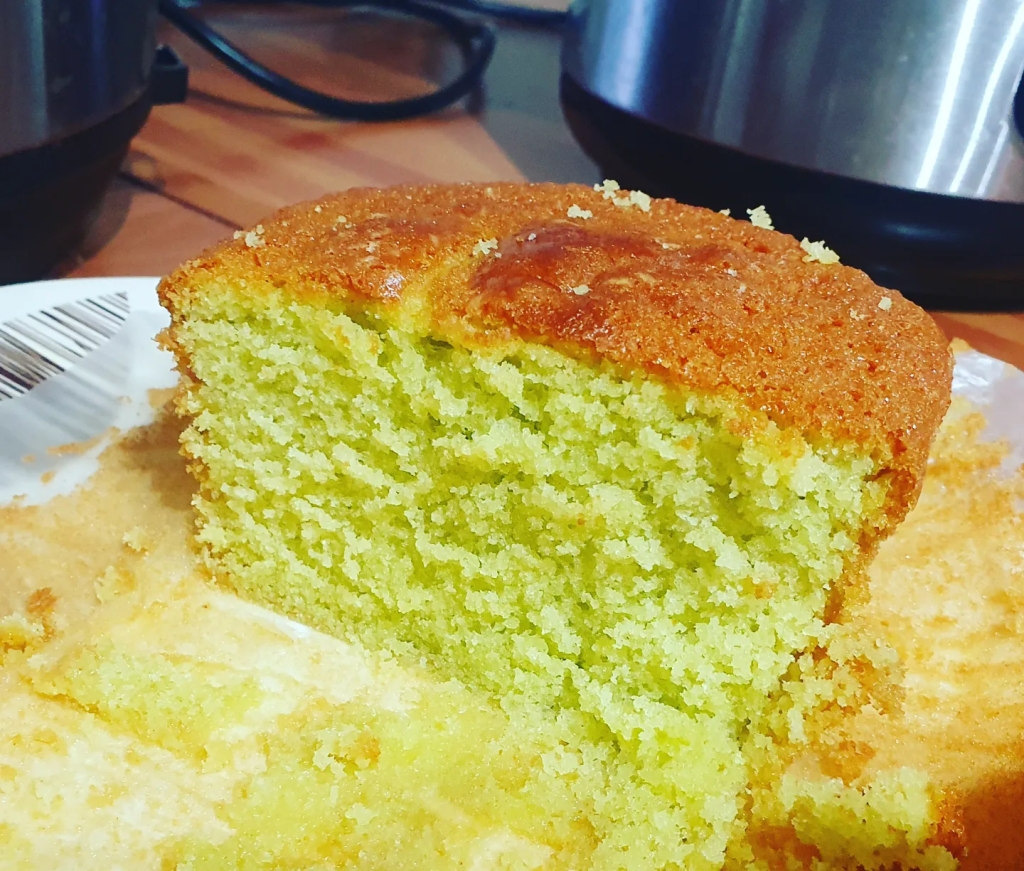
I recently bought some pandan extract from a Chinese grocery store. I found this recipe from the Decorated Treats blog and I didn’t fancy making a pandan chiffon cake as I find that process quite complicated! If you have never had pandan flavour before, it has a vanilla and flowery taste. This recipe is a pound cake so the method is really easy and it tastes delicious! I have already made this cake twice!!

Ingredients – 180g salted butter, 180g granulated sugar, 180g Self-raising flour, 3 x eggs, 3 x tbsp milk, half tsp of baking powder, pinch of salt, 1 tsp pandan extract. Optional – green food colouring.

Method:

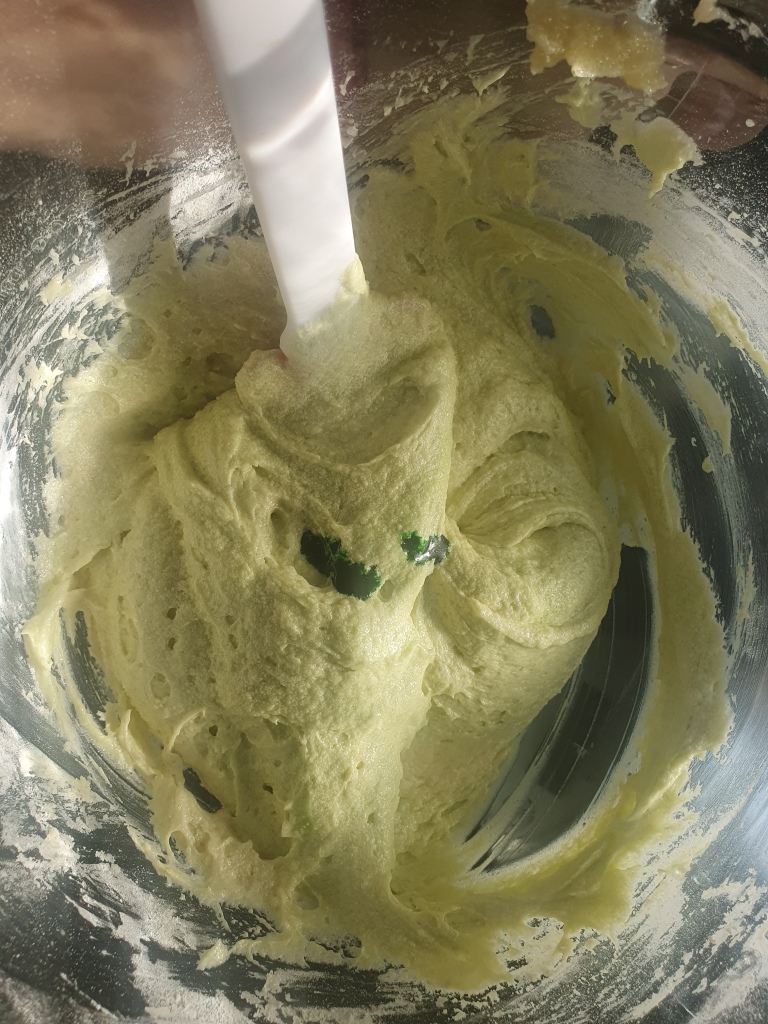
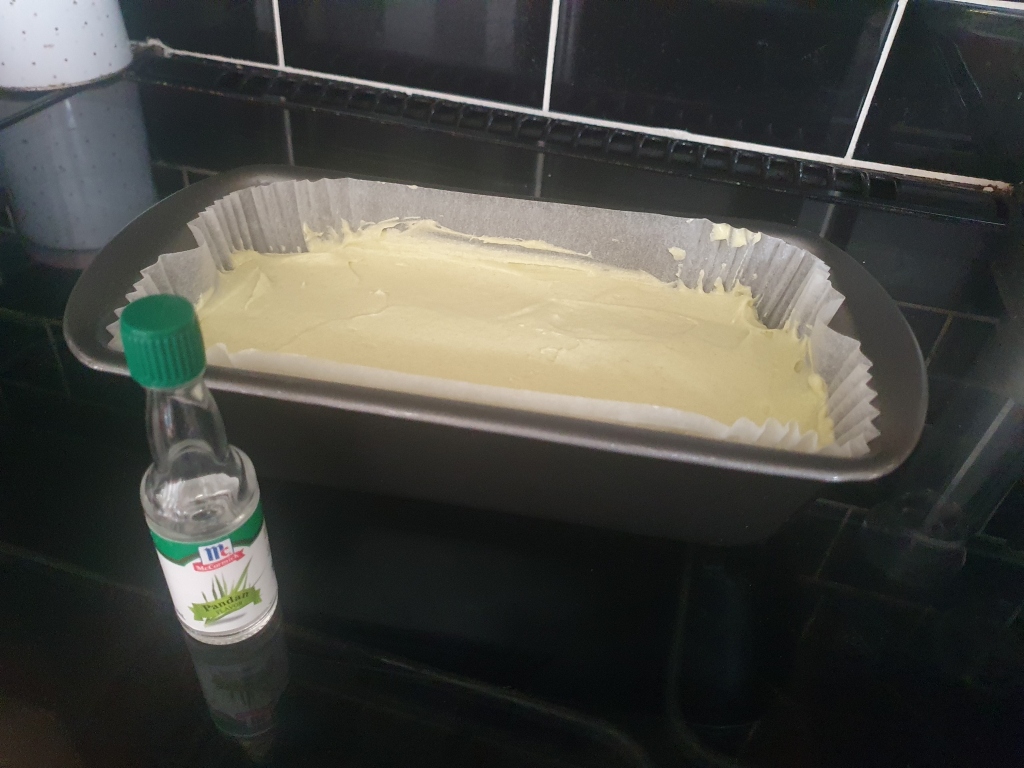
  1. Preheat oven to GM3 and line your loaf cake tin. Cream the butter and sugar until light and fluffy into your mixer.
  2. Beat in the eggs, one at a time. Sift the flour, baking powder and salt and mix this into the creamed mixture in 3 batches. Alternate each batch of flour with milk, starting and ending with flour.
  3. Add the pandan extract and if your extract is white, add some green food flavouring. Mix until well combined.
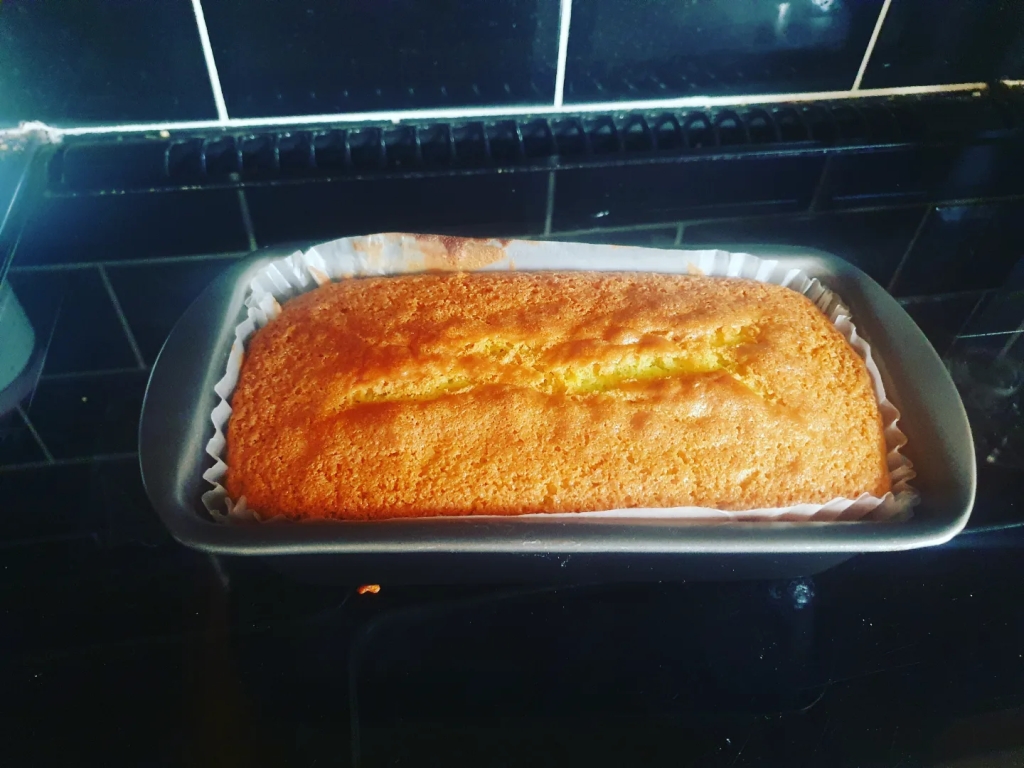
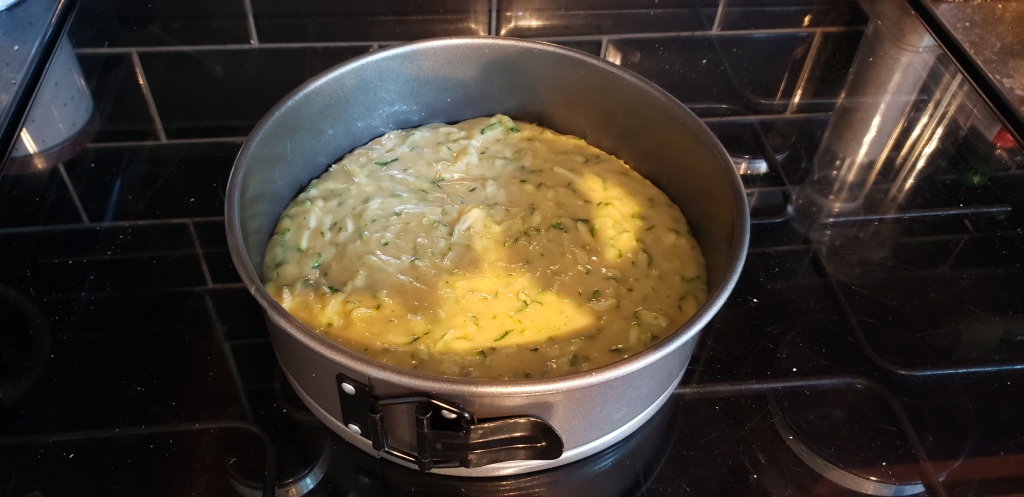
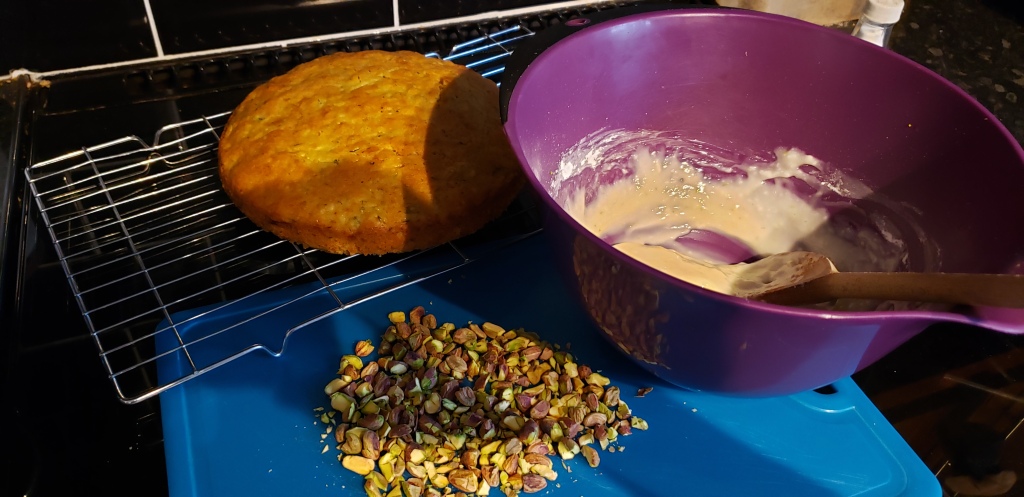
  4. Pour the batter into your loaf tin and smooth it at the top. Bake for 40 minutes or until the cake is ready (no wet batter sticking to the skewer to check). Leave it in the tin for 5 minutes and turn it out onto a wire rack to cool completely. Enjoy!

Pistachio and Lime Courgette Cake

I had lots of courgettes in the fridge and thought why not use it for baking. I must admit, that i haven’t really used vegetables in baking as i think it is strange! But i have seen alot of recipes ie beetroots, carrots etc and interested in how the bake would turn out.

I love looking at recipes in the book and i found a recipe called Pistachio and Lime Courgette Cake in Martha Collison’s Twist book (page 74) and decided to give it a go! I have baked a loaf cake with courgettes and lemons from Lorraine Pascale’s books and it turned out really tasty! You wouldn’t think courgettes can be used in a cake but it is actually really nice as it keeps the cake really moist!

For this cake, i really think the icing makes the cake delicious as it brings a nice sweetness to it as the limes are quite a subtle taste. You don’t need too many ingredients to make this cake and i didn’t use 250g icing sugar, probably around 150g is sweet enough!

The boys enjoyed baking it but when it came to eating it, they didn’t like the ‘green’ bits inside the sponge!! lol! The cake was really yummy!

Ingredients: Cake – Butter for greasing, 250g courgettes (2-3 small ones), 2 x eggs, 125ml vegetable oil, 150g caster sugar, 225g self raising flour, 1/2 tsp baking powder, 1/4 salt and zest of half a lime. I always add 1 tsp of vanilla extract into the cake mixture.

Icing – 100g full fat cream cheese, 150g or 250g icing sugar, zest and juice of half a lime, 30g chopped pistachio nuts.

Method: Preheat oven to GM4, grease a 20cm tin and line with baking paper. Grate the courgettes coarsely, don’t do it too finely as it will go mushy! Try and squeeze out the water from the courgettes or otherwise the cake would be really soggy. I have read in the past that you can put the courgettes in a table cloth and squeeze out the water. As it is quite a small amount, i just used my hands to squeeze the water out.

Put the eggs, sugar, old and in a bowl and beat until creamy. Fold in the flour, baking powder and salt. Stir the courgettes and zest. The mixture will look quite dense like and not like a cake mixture! Pour the mixture into a tin and bake for 35-40 mins until golden on top and firm to touch. Remove from the oven and leave to cool in the tin before decorating.

Make the icing by beating the cream cheese, icing sugar, lime juice together until smooth. Spread on top of the cooled cake and the sprinkle the pistachio nuts on top and the left over lime zest.

Carrot Cake – Rachel Allen

It was my mum’s birthday last month and I know one of her favourite cakes is the ‘Carrot Cake’. This recipe is from Rachel Allen’s Bake cookbook and it is really simple to make! The longest task was grating all the carrots! I think for next time if I am making a carrot cake, I will just buy the grated carrots in the packets from the supermarkets as I hate grating! :p

For the icing, I would use halve the quantities from the below as suggested from her book as I had so much icing leftover, that there was enough to make another carrot cake! You can also use the icing to decorate your cupcakes.

Ingredients:

  • 2 x eggs
  • 140ml sunflower/vegetable oil
  • 200g soft light brown sugar
  • 300g grated carrots
  • 100g raisins
  • 75g pecan/walnuts chopped up (optional)
  • 180g Self-raising flour sieved
  • Half teaspoon of bio carbonate of soda
  • 1 teaspoon of ground cinnamon
  • Half teaspoon nutmeg
  • Half teaspoon of mixed spice
  • Pinch of salt

For the Icing (if you don’t want too much icing, then use half of the quantities below):

  • 250g cream cheese (from the fridge)
  • 50g butter softened
  • 1 x tsp vanilla extract
  • Zest of 1 orange
  • 275g icing sugar sieved

Method:

  1. Line the loaf tin and preheat the oven to GM2 at 150 degrees.
  2. Whisk the egg first and then add the oil. Pour in the sugar and mix with the carrots, raisins and chopped nuts.
  3. Sift in the dry ingredients and bring the mixture together.
  4. Pour into the loaf tin and bake for an hour and 15 minutes or until the skewer comes out clean with no crumbs.
  5. Leave in the tin to cool for about 5 minutes and then pop it onto a wire rack to cool completely.
  6. Make the icing by beating the cream cheese and butter until soft, then add the icing sugar, vanilla extract and orange zest and mix to combine. Once the cake is cooled, spread the icing. It should be smooth and thick. Cut into slices to serve.

Homemade Vanilla Extract

I always use Vanilla Extract in my bakes and sometimes even when the recipe doesn’t list it, I would still add 1 teaspoon. In my cupboards, I tend to have several bottles of vanilla extract, I never understand why they don’t sell it in a big bottle!

Last August, I saw on Gemma’s blog that you can make homemade vanilla extract with just 2 ingredients! I thought it was a complicated process but when I read her blog post, it couldn’t be simpler! I was amazed how easy this was to make, it is just a matter of really waiting for the vanilla pods to be absorbed. You can visit her blog as she gives you methods of how you make other flavoured extracts.

All you need to buy is a probably 5- 6 vanilla pods, split them in the middle to open up the seeds and then get a bottle with a tight cap/lid and pour the vodka in! It will be a clear mixture but as the weeks goes by, you will see the colour change and it will be a nice brown colour! Shake the bottle a few times during the week to mix it and the vanilla extract will be ready to used to in about 6 week’s time! I was really surprised that it was made of vodka!! My vanilla extract is now ready to use so I can’t wait to try the flavour!

After 8 weeks, I tried it and you can definitely still taste the vodka which was pretty strong! I thought how can this be used to bake but found online that the alcohol would just burn off when the mixture is being baked. So, I tried this with my favorite banana cake recipe and it’s true, you can’t taste the vodka!! The cake was delicious! Can’t believe I made my own vanilla extract with vodka!!

White Chocolate Blondies

Making ‘Blondies’ have been on my list to make as I wanted to bake a sweet treat for our picnics. We have been lucky recently as the weather has been quite warm for us so I wanted to make something that wouldn’t melt easily!

I would describe ‘Blondies’ like a cake/brownie! The texture is thicker than a brownie like a cake and inside is still soft which is like a brownie! You have to try out the recipe to see what I mean! So, what’s the difference between a blondie and brownie then? Blondie is made without chocolate being the main ingredient. Brownies are made with chocolate or cocoa powder. The typical blondie is made with white chocolate chips but you can add other ingredients such as nuts, dried fruits or milk/dark chocolate chips etc or simply have it plain!

This recipe was really simple, I think it took longer to measure out all the the ingredients than to actually make it! This recipe was from Deliciously Sprinkled blog and the instructions are very clear, I love it with pictures as well. I had to convert some of the measurements for the ingredients as she used ‘Cups’ as I normally weigh my ingredients in ‘Grams’. Please find below the converted version for your reference and I have tweaked the sugar intake as it is pretty sweet already with the white chocolate chips!

Ingredients: 280g plain flour, 1 x tsp of bicarbonate of soda, half tsp of salt, 170g soft butter, 80g granulated sugar, 80g light brown sugar, 1 x tbsp vanilla extract, 2 x eggs and 200g white chocolate chips.

Method:

  1. Preheat over to GM 4 and line your square baking tin with baking paper. Whisk the dry ingredients – flour, salt and bicarbonate of soda in a bowl and set aside.
  2. Cream the butter and sugar and vanilla extract until well combined. Add the eggs one by one and mix altogether in your mixer.
  3. Add the flour until the mixture is just combined. Don’t over mix it because the texture would be heavy. Stir your chocolate chips or any other flavourings.
  4. Press into your tin and spread evenly. Bake for 20 – 25 minutes until it looks golden at the top. The texture should be abit hard at the top and slightly gooey inside. Then, leave to cool in the tin and slice it up and enjoy!

Coconut Pound Loaf Cake

I had some left over coconut milk so I looked up at some recipes and found this blog called LoveFoodies which has a Coconut Pound Loaf Cake. I don’t really use coconut in baking as the kids don’t like it but i didn’t want to waste the coconut milk! There will be more for me and my hubby! 🙂

I had most of the ingredients at home but just needed to buy the desiccated coconut. Really easy to make and the cake is delicious as it is very moist! Very Yummy! :). I have tweaked the original recipe as i didn’t want to use too much sugar!

Ingredients: 175g soft butter, 175ml coconut milk, 200g caster sugar, 3 x eggs beaten, 225g plain flour, 1 and half tsp baking powder, half tsp of salt, 1 x tsp vanilla extract and 6 x tbsp desiccated coconut.

For the topping: 4 x tbsp coconut milk – i added a table spoon of icing sugar, 1 – 2 tbsp desiccated coconut.

Method:

  1. Preheat oven GM3 and line a loaf tin. Cream the butter and sugar until a light and pale colour.
  2. Add the eggs in slowly, then add the coconut milk and half the flour, baking powder, salt, vanilla extract, on a slow speed on your mixer. Once combined, add the desiccated coconut and the rest of the flour.
  3. Transfer to the loaf tin and bake for an hour. Check with a skewer and if it comes out clean, then is it ready. I probably baked my cake for 1 hour and 10 minutes, i wanted the top to be nice and golden.
  4. Leave the cake in the tin to cool. Whilst the cake is still hot, use a skewer to prick holes on top of the cake and then pour the coconut milk over. Then, to finish the cake, sprinkle with some desiccated coconut on top and leave to cool. Enjoy your cake with a cup of tea! 🙂

Classic Victoria Sponge Cake

It was Mother’s Day last Sunday, and my mum loves a good old classic Victoria sponge cake! One of my favourite baker is Jo Wheatley and I always use her recipe from her book – A Passion for Baking as it never fails! The boys helped weighed all the ingredients and I just used my kitchen aid to mix it altogether. Simple! 🙂 Then, the boys decorated the cake with jam and buttercream and chocolate on top. They kept licking all the buttercream from the bowl! lol! I personally prefer this sponge with buttercream in addition to the jam because it adds abit of sweetness and it looks pretty! 🙂

Ingredients: Cake – 200g Self Raising Flour, 1 x tsp baking powder, 200g caster sugar, 200g soft butter, 4 x eggs and 1 x egg yolk beaten, 1 x tsp vanilla extract. For the Filling, jam – enough to spread the bottom of the cake and buttercream which is made of 500g icing sugar, 125g soft butter, 1 x tsp vanilla extract and 2 x tbsp of milk depending on your mixture.

Method:

Preheat oven to GM4, butter and line each the base of each cake tin. I normally used the baking paper that are already cut into circles which you can buy from Lakelands. This uses the ‘all in one’ method where you just tip all the ingredients into your mixture until it is smooth!

Divide the batter evenly a use a palette knife to smooth it over at the top. Bake for 25-30 minutes until the cake is golden and well risen. Remove from the oven and carefully turn the cakes out of the tin, peel off the parchment and leave to cool on wire cooling racks. I tend to leave it out for 5 minutes or so before taking them out.

For the decoration, turn 1 of the cake upside down and spread the jam and buttercream. It’s up to you which one you spread first as it doesn’t matter the order as it still taste delicious! I thought, i had a chocolate writing pen in my cupboards but i didn’t so i used an icing pen to write out the text and the boys did the filling and decorated the cake with chocolate sprinkles on top. Hundred and thousands would look pretty on top of the buttercream but i didn’t have any!

I think i need to restock my cupboards with decorations etc as i haven’t really been to the shops when the boys are being home schooled! Now, i have finally got freedom as the boys are back in school and they are very happy! 🙂 Hope you all had a wonderful mother’s day! 🙂

My favourite banana cake!

We had alot of bananas in the house which were very ripe and also my mum gave me a batch of her bananas that was too ripe for her to eat! I must admit, that I am quite sick of bananas at the moment as probably for the past 3 weeks, I have made approx 5 x banana loaf cakes and a batch of banana cupcakes!!!

This is my favourite banana cake recipe and it is so simple, it is from BBC Good Food website – Brilliant banana loaf. You can not go wrong with this recipe, it works perfectly every time and the cake is very moist and will keep good for several days.

I have made some slight tweak to the recipe – 140g self raising flour, 1 x tsp baking power, 2 x eggs, 140g butter, 100g caster sugar, 2 x ripe bananas and 1 vanilla extract. I used to make the icing at the top and then add some chocolate sprinkles to make it look pretty! But, you can just have the cake without the icing as it is sweet enough already! Enjoy! 🙂

Birthday cake request from my hubby!

Ready for cutting!

Ready for cutting!

It was my hubby’s birthday last week and I asked him, what does he want me to bake for him! He requested the blueberry and lemon traybake as that is his favourite cake! Normally, you should use a rectangle baking tin, but i couldn’t find mine so I have used a square tin instead.

Ingredients:

  • 125g soft butter
  • 225g caster sugar
  • 2 x eggs
  • 250g soured cream
  • 1 lemon zest and juice
  • 300g self raising flour
  • 1 teaspoon vanilla extract
  • Half teaspoon baking powder
  • 150g blueberries

Cream Cheese Topping

  • 50g soft butter
  • 300g icing sugar sieved
  • 200g cream cheese
  • 1 to 2 table-spoon of lemon juice
  • 50g blueberries

Method

  1. Preheat oven to 180 GM4 and line a rectangular baking tin
  2. Beat the butter and sugar until light and fluffy. Beat the eggs in one at a time until combined. Stir in the soured cream, lemon juice and zest, baking powder until everything is combined. Fold in the blueberries.
  3. Spoon the mixture into the cake tin and bake for 40 – 45 mins until the cake is baked. Remove from the oven and set aside to cool.
  4. Make the cream cheese topping by beating the butter and icing sugar until light and fluffy. Beat in the cream cheese and lemon juice and spread over the top of the cake. Make sure the cake is cool before you add the topping. Add some blueberries on top and I added some chocolate sprinkles.

My hubby was very pleased with his birthday cake! 🙂

Yum Yum!!!

Yum Yum!!!

Happy Nutella Day!!!

It was world’s nutella day on Thursday 5th Feb!! I haven’t heard of this day before but saw posts and tweets online with lots of nutella recipes!

I saw this brownie mixture online and it only uses 3 ingedients and thought that is so simple, I can do this!! As I have my little boy now, it is difficult to find time to bake unless my hubby looks after him! I wanted to celebrate this day as well and decided to try this recipe out!!

All was needed was 90g plain flour, nutella x 400g jar and 3 x eggs. I added a tsp of vanilla extract and a handful of chopped up roasted hazelnuts to this recipe. Bake for 15 to 20 mins at gas mark 4. Let it cool in the tin so that it sets and cut!! Yum!

image

image

They turned out delicious!!! Really moist inside and better eaten the next day!! Recipe said to cut into 12 pieces but u can cut them smaller as it is quite indulgent!!! Happy nutella day!!!