Toasted Chocolate Pancakes!

My boys came me the other week and said they wanted to try out this new TikTok recipe that they saw on YouTube – toasted chocolate pancakes! They showed me the clip and I thought, ok, let’s try it out! They were super excited as it is something that they can make themselves and it’s quite fun! 🙂

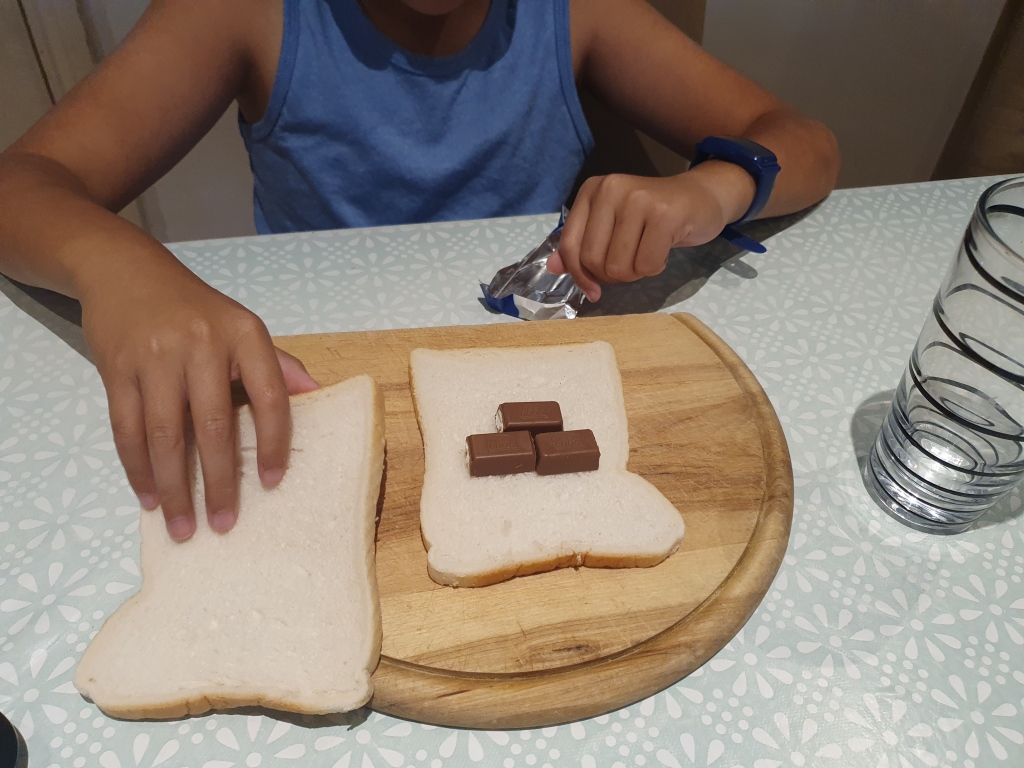
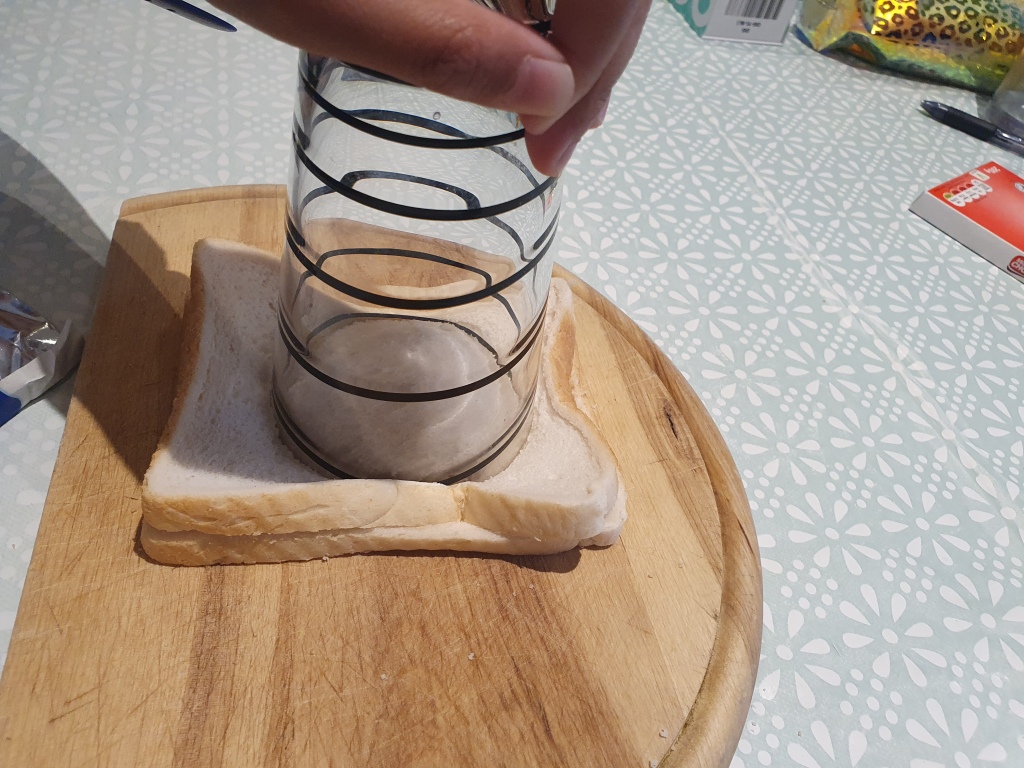
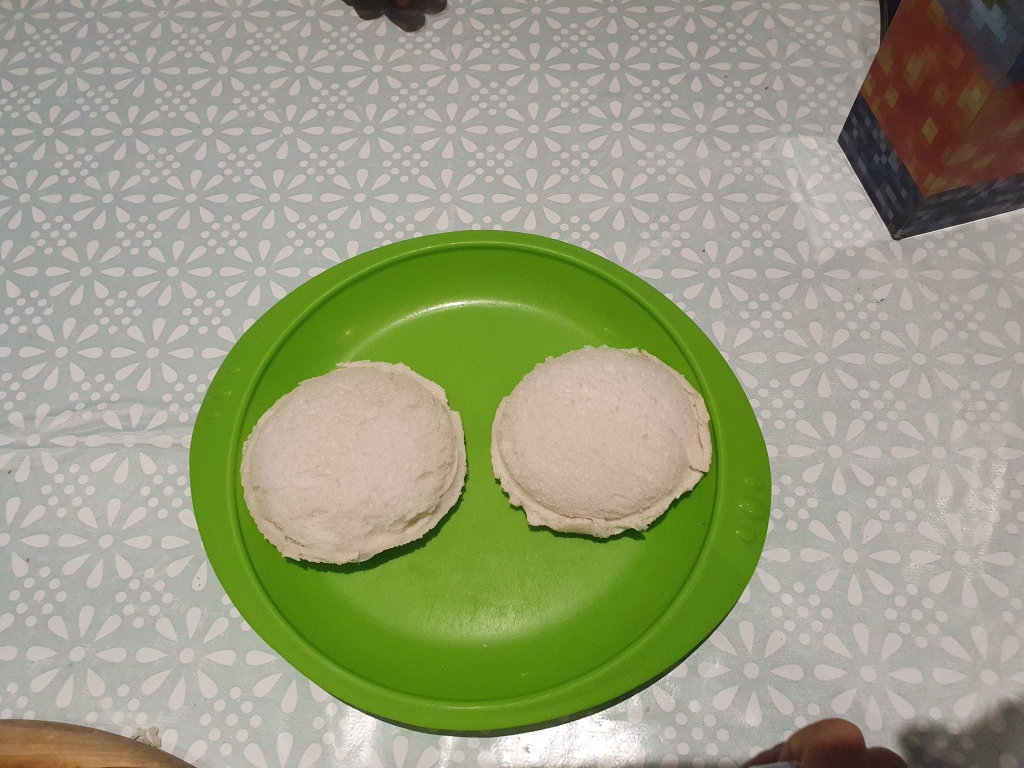
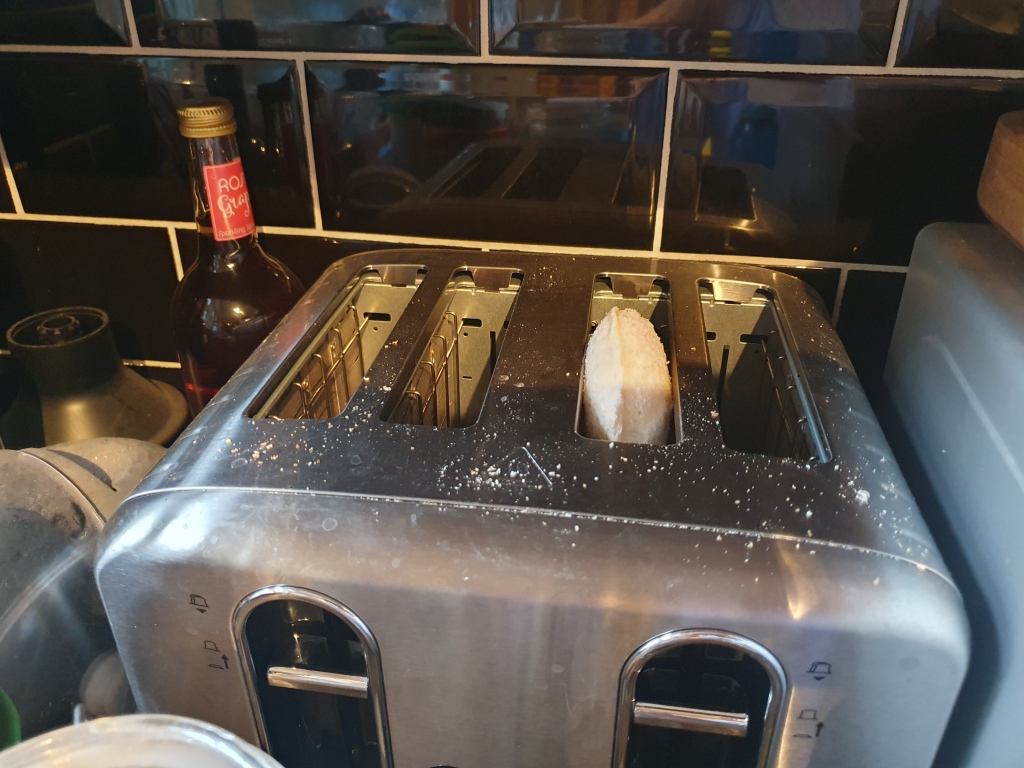
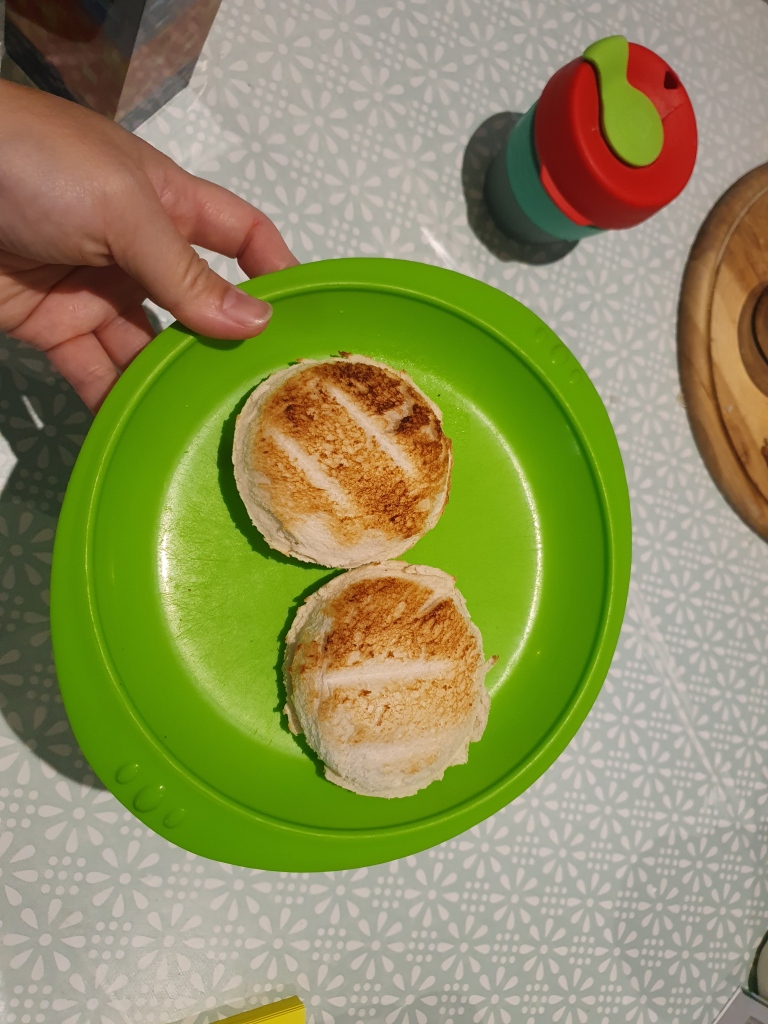
So basically, you have 2 pieces of bread and you add your Kinder chocolate (3-4 pieces), I used another brand as that’s what I have got at home. Then, you use a glass and cut out a circle. Press the edges together so that it is sealed and pop in your toaster for a few mins!

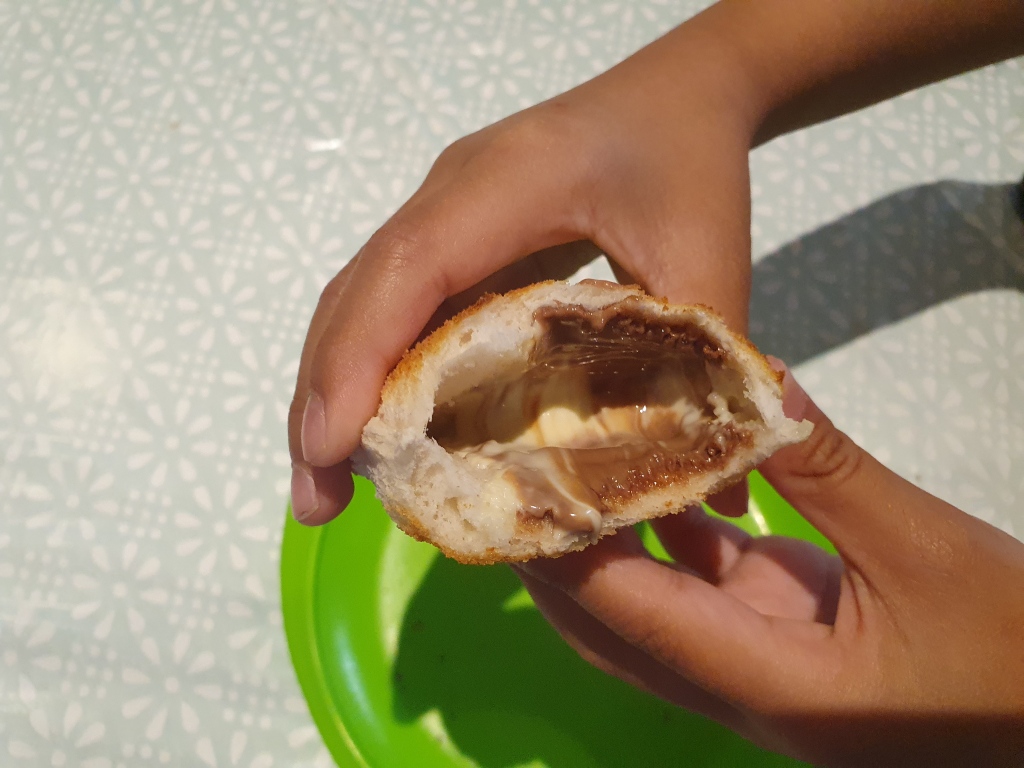
I didn’t think it would work as I was worried that the chocolate would leak everywhere but it was contained! And, it tasted really nice so I was pleasantly surprised! Doesn’t take long to prep this and it’s fun for the kids to make! However, I did tell the boys, they can’t be having this every weekend, once in a while! 😛

Chocolate Digestive Brownies

I love buying snacks and biscuits, my hubby calls me a snack hoarder! My snack cupboard is so full as I love buying but not eating or nor do I let the boys go in there!! I do empty it out once in a while because I forget what I have brought!

I found some chocolate digestives that was close to expiring and the boys didn’t want to eat them so I looked online to see what I can make. I found a recipe that uses the chocolate digestive biscuits in the brownies from Food Magazine – Alia Faisal. Normally, when I make brownies, I add white chocolate drops so I thought it would be interesting to add the biscuits in the mixture.

The brownies was delicious as it had a crunchy texture but also very chocolately!

Ingredients:

Unsalted butter – 175g
Dark chocolate – 100g
Milk chocolate – 100g
Chocolate digestive biscuits – 150g, crushed
Plain flour – 130g
Caster sugar – 300g – I only added 150g because i think the chocolate is sweet enough!
Large free range eggs x 3

Method:

  1. Preheat the oven to 150°c/gas 2 and prepare a standard 23×33 cm brownie tray.
  2. In a heat proof bowl, melt the butter and chocolate over a pan of simmering water making sure that the base of the bowl is not touching the water.
  3. Once the chocolate and butter have completely melted and slightly cool add the flour and sugar and mix well. Now add the eggs and beat till it forms a smooth mixture.
  4. Add crushed digestive biscuits and give it a quick mix by hand before pouring it into the baking tray. Bake for 35 minutes for the perfect brownie that has a nice crust but squidgy and moist from the inside.

Sunday Treats! Peanut Butter Squares

Sunday Treats! :)

Sunday Treats! 🙂

The weather is hot and it is Sunday afternoon, I don’t feel like baking but I feel like I need to make something!!! A treat of some sort without using the oven! A couple of weeks on TV, I saw Lorraine Pascale making some ‘Peanut Butter Squares’ and it looked really simple to make with only a few ingredients! I decided to give this recipe a go as I had all the ingredients at home! I used Hobnobs Oaty biscuits instead of digestive biscuits and I used a foil tin tray for this as I couldn’t find my square tin. They were so yummy and it goes well with a nice cup of tea!!! 🙂

Here’s the ingredients:

  • 200g melted chocolate, you can use dark or milk or a combination of both
  • 150g melted butter in a pan
  • 250g digestive biscuits
  • 200g soft light brown sugar
  • 300g crunchy peanut butter
  • 1 x tsp vanilla extract
  • 20cm / 8 inch square tin lined with parchment paper

Method:

  1. Melt the butter in a large pan
  2. Melt the chocolate either in the microwave or in a bowl over simmering water
  3. Blitz the digestive biscuits and brown sugar in a food processor to give fine crumbs. Tip them into the melted butter. Stir in the peanut butter and vanilla extract and mix together so everything is combined
  4. Tip the mixture into the lined square tin and press it down with the back of the spoon. It needs to be really compact and tight. Then pour over the melted chocolate, tilting the tin back and forth until the whole thing is evenly covered
  5. Pop in the freezer for 30 minutes to firm up or in the fridge for an hour
  6. Once the chocolate is set, remove it from the freezer or fridge and lift it out of the tin with the help of the baking parchment. Remove the paper and then use a sharp warm knife and cut into 16 squares. Normally, you can store them in a jar or tin but as the weather is quite hot, I have left them in the fridge! 🙂

All the ingredients!

All the ingredients!

Biscuits and sugar ready for blending!

Biscuits and sugar ready for blending!

All mixed in!

All the ingredients mixed in!

Pressed into the foil tray

Chocolate poured on top ready to set in the fridge!

Chocolate poured on top ready to set in the fridge!