Happy Chinese New Year – RABBIT 2023

Chinese New Year has come extremely early this year as it is on Sunday 22nd January, normally, it is around February time. So, it is the year of the Rabbit and I was looking for some bakes with a rabbit theme. I came across this blog and thought it was an easy recipe to follow.

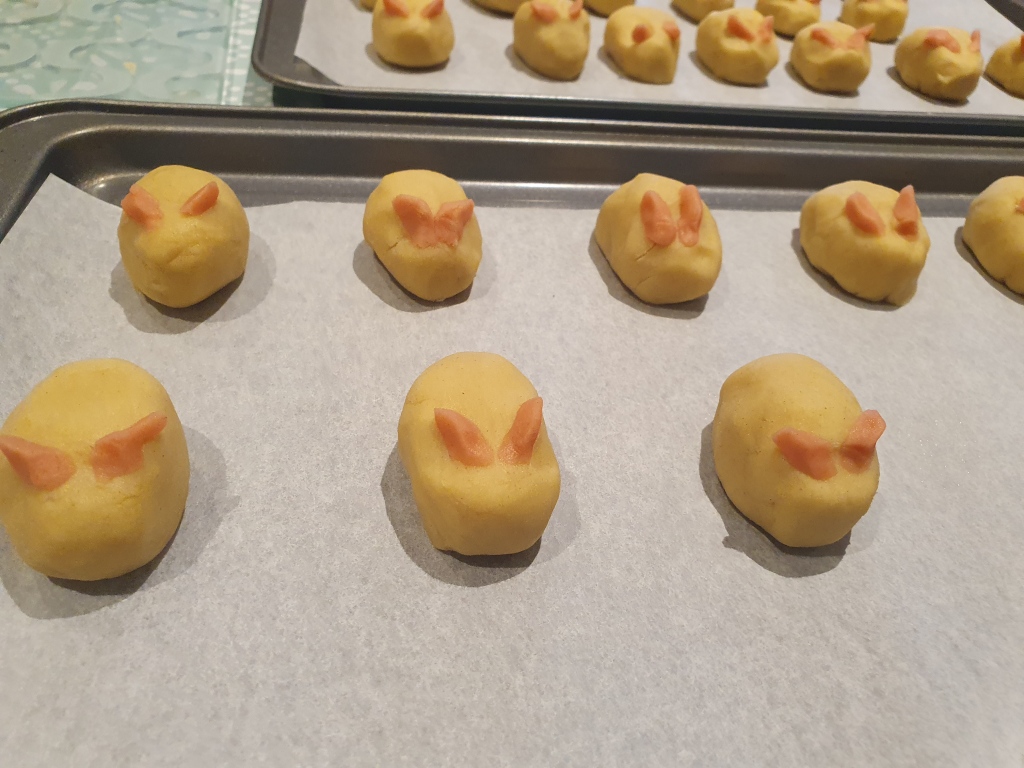
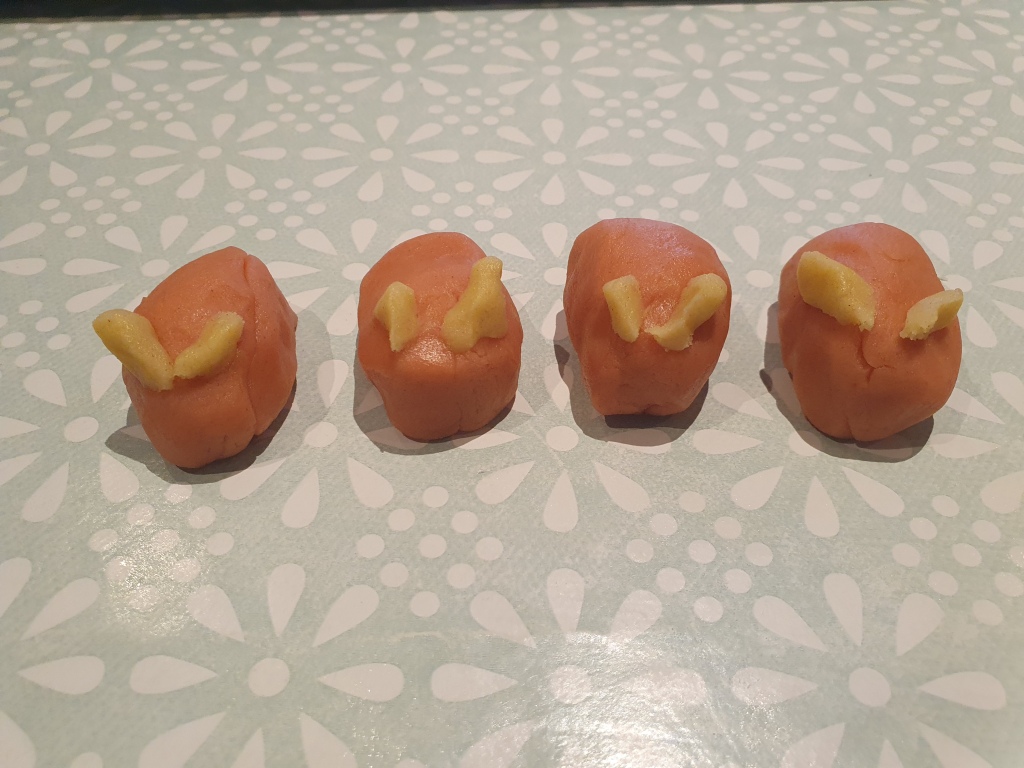
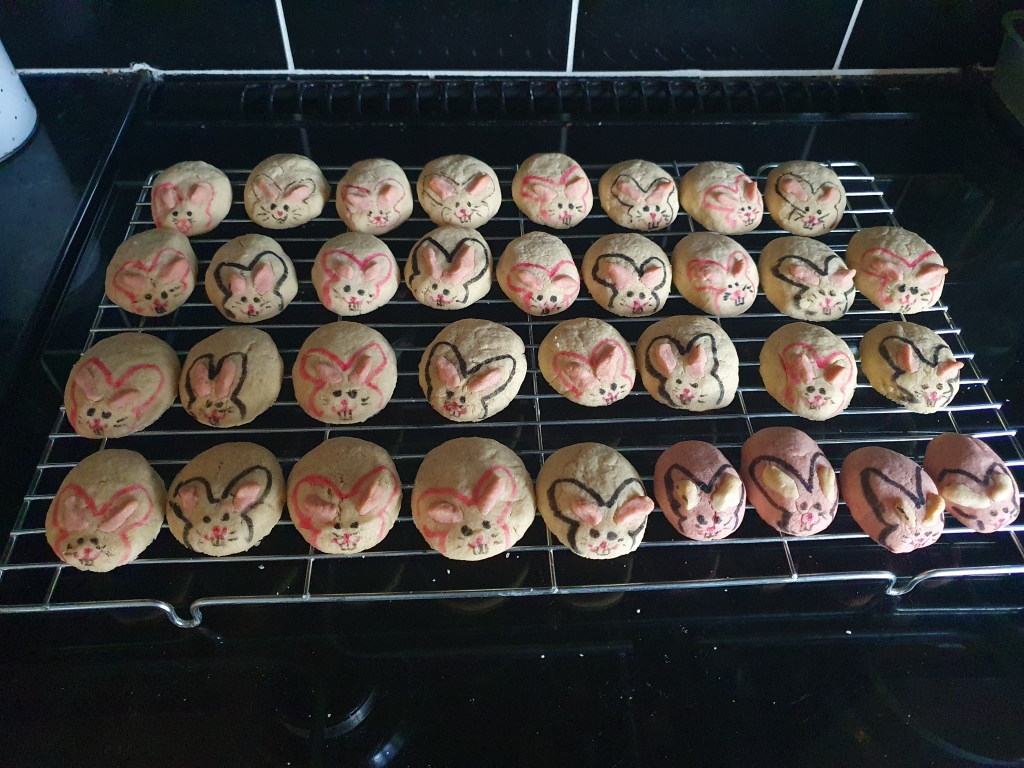
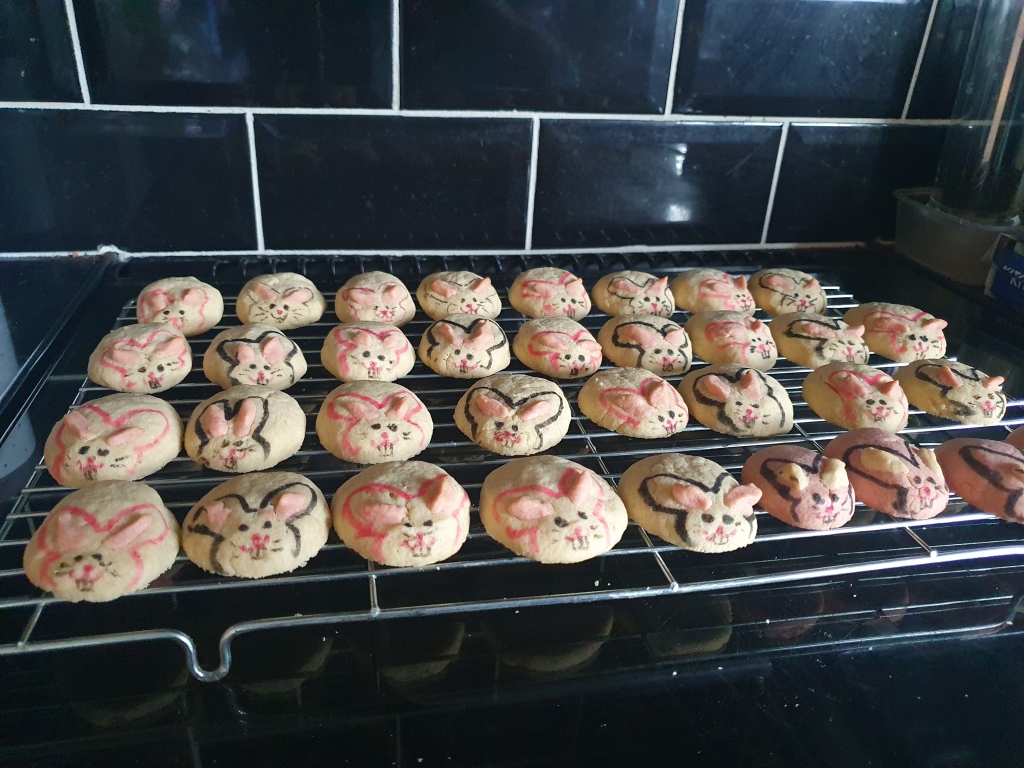
My rabbits look like little mice as they didn’t look as plumped, still cute though! It took more time to shape the bunnies and ears and decorating than to make the actual mixture itself! All the ingredients can be found at home in your store cupboard so the only thing you might need to buy is some red food coloring gel to make the pink dough. Also, I didn’t use chocolate for the eyes as I have got some edible ink pens to draw the faces.

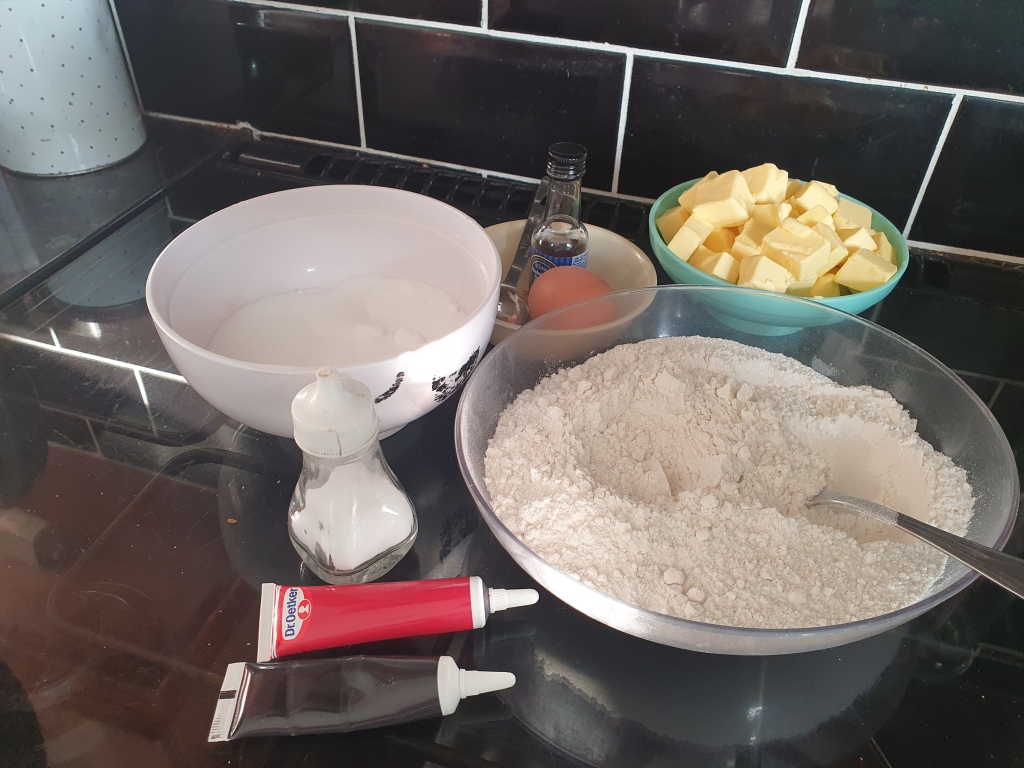
Ingredients – 360g Plain Flour, 150g Caster Sugar, 227g soft butter, 1 egg, 1 tsp vanilla extract, 1/4 tsp of salt, and red/pink food coloring gel. Edible ink pens or writing icing pens.

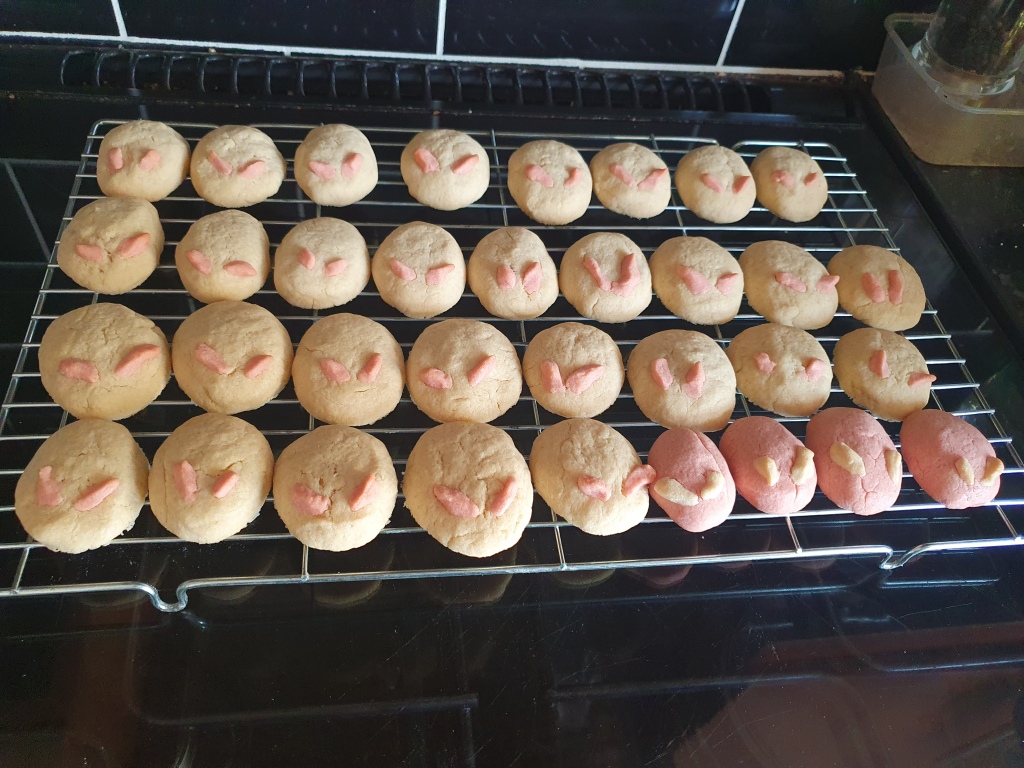
Method: Cream the butter and sugar until soft and fluffy. Add the egg and vanilla extract to make the mixture smooth in your mixer. Add the salt to the plain flour and then add this to your mixture. Turn the dough out and knead gently until it is smooth. If the dough is too sticky or soft, put it in the fridge for 15 minutes so that it is easier to handle. Take 1 tablespoon of the dough and add a few drops of the red gel to make the mixture pink. These are for the ears.

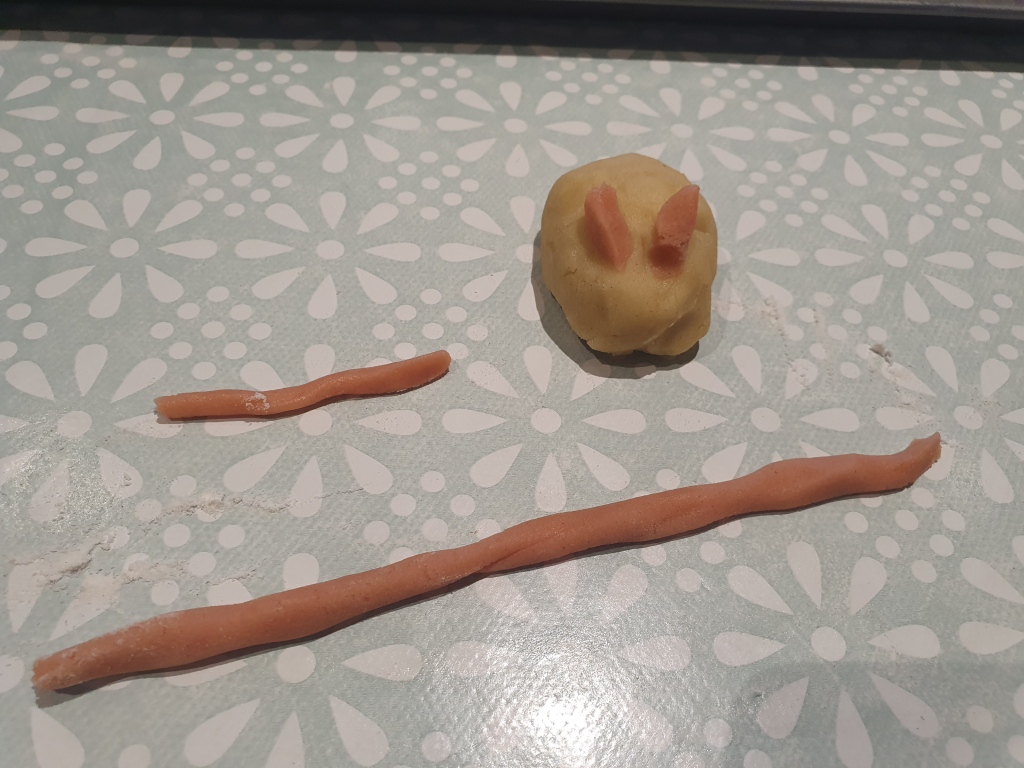
I used a tablespoon of the dough per rabbit and shaped it like a pear and then with the pink dough, I rolled it into a string to make the tiny ears. It is quite fiddly trying to stick the ears on the rabbit. When you have made the rabbits, put them in your fridge for about 15 minutes and preheat the oven to Gas Mark 4 – 180c, and bake for 15 minutes. Let it cool and then afterward you can decorate the face with edible pens/icing pens and enjoy! 🙂

Happy Chinese New Year to all my family and friends!! Wishing you all good health and happiness for 2023!!!

Dee’s Christening Food!

Happy Christening Dee!

Happy Christening Dee!

I am pleased to say that Dee’s Christening went really well last Sunday, he was very well behaved and looked like he enjoyed the event!! People were so generous as we recieved so many gifts, i haven’t even attempt to open anything yet as there are 2 massive grocery bags which are filled with cards and pressies!!! 🙂

We hired a caterer for this event as there were over 100 people to feed! The main dishes were:

  • Boiled rice
  • Vegetarian noodles
  • Sweet and sour fish
  • Caldereta (their filipino signature dish)
  • Chicken and mango
  • Lechon
  • Vegetables
  • Lasagne, pesto pasta, samosa – ninangs (god mothers) made


Dee's christening


Dee's christening


Dee's christening


Dee's christeningFor desserts, everybody chipped in to make them, the ninangs, titas, and my mother in law made her famous fruit salad! Everybody goes mental for it esp my brother-in-law, Josh who eats ‘bowls’ of it at one time!!! I am sure that mum probably saved him a big bucket of fruit salad at home! :p

Yum!

Yum!

There were strawberry cheesecake, bibingka, brownies, rice crispies and coconut bites, oreo cupcakes, whoopie pies, oreo cheesecake, fruit salad, melons and watermelons! Lots and of course, Dee’s Christening Cake! 🙂 We ordered this from ‘Cake Box’, they make eggless cake and the sponge is so soft and light. For more info on their cakes, visit their website.


The perfect cheesecake

Yum Yum! :)

Yum Yum! 🙂

Lately, I have been making a lot of cheesecakes and have been using one of Jo Wheatley’s recipe!! My hubby was a keen cheesecake eater but after 3 weekends of the same dessert, he is sick of them!!!

Very simple to prepare and easy to bake!! I would normally decorate this with berries on top with melted chocolate and it looks very impressive! The cheesecake taste like a new york cheesecake, very creamy and smooth!!! I have experienced the cheesecake to have a few cracks once baked, I looked this up on Google to see why this was happening and it suggests the following reasons, that your oven is maybe too hot, cheesecake is over baked, or the batter is over mixed with too much air. Once you have baked the cheesecake, it is best to run a palette knife round the sides as the cheesecake will shrink once cooled!!

Here’s the recipe:

  • 70g melted butter
  • 11 x digestive biscuits
  • 600g full fate cream cheese
  • 2 x tbsp plain flour
  • 175g caster sugar
  • 2 x tsp vanilla extract
  • 2 x eggs
  • 1 x egg yolk
  • 284ml sour cream ( i just used a 300ml pot)
  • 3 x tbsp icing sugar, sifted

Method:

  1. Preheat the oven to 180c/350F/Gas Mark 4. Grease a 20cm springform cake tin
  2. Melt the butter and crush the biscuits in a food processor and mix together. Press the crumbs into the base and bake in the oven for 5 minutes. Remove from the oven and cool to prepare the filling
  3. Beat the cream cheese until smooth, then add the flour, sugar, vanilla extract, eggs, yolk and half of the sour cream. Beat until smooth, light and fluffy. Pour into the tin
  4. Bake for 30 mins until only just set. Remove from the oven and leave to rest for 5 mins.
  5. Mix the remaining sour cream with the icing sugar and spoon over the cheesecake carefully. Return to the oven for a further 15 mins until just set but still very slightly wobbly in the centre
  6. Leave the cheesecake to cool in the tin and then chill in the fridge for atleast 4 hours or overnight. It is best to serve under room temperature. Remember, when you take the cheesecake out from the oven, run a palette knife around the edge to prevent cracks. Decorate with berries on tip and melted chocolate! Yum! 🙂

All decorated!

All decorated!

Mum’s Birthday – Lunch at The Grove

The Glass House

The Glass House

It is my mum’s birthday today and I have booked a table for 3 at the Glass House restaurant which is at The Grove Hotel in Watford (http://www.thegrove.co.uk/food/the-glasshouse/). I don’t normally have buffet meals as I always feel that I don’t eat my money’s worth because my appetite is not huge! I have eaten there before, although many years ago and the food was excellent from what I remembered!!

The staff there were all very welcoming, friendly and not snobbish! There was so much to choose from, I didn’t know where to start!There were lots of different cuisines being offered such as mediterranean with the cold meats and tapas, japanese – sushi, english – roast beef and pork, Malaysian – laksa!! There was a seafood salad bar and lots of other different types of salad. I started with seafood selection for my starter as I don’t normally eat this at home so I like to choose food that I don’t normally cook! The prawns were the best as they were so sweet and juicy!!! 🙂

Seafood Starter

Seafood Starter

Main Course

Main Course

I had my main meal which consisted of a piece of roast beef and a slice of pork as I wanted to try out the different meats. I loved their vegetable selection! Hmmm… and the desserts, I was in absolute heaven when I saw the yummy selection!!! I have got such a sweet tooth! There were so many and in the end, we did practically try most of them as we shared them out!!! I was extremely stuffed!!! My mum was so cheeky! She asked the waitress if she can have some vanilla ice cream as this wasn’t on display as I think the ice cream was mainly for children eating there! The waitress was really nice to us and gave us 3 big scoops of ice cream so my mum was easily pleased! 🙂

Yummy!

Yummy!

Heaven!

Heaven!

My Mum's Bday Cake!

My Mum’s Bday Cake!

Also, towards the end of our meal, they brought a plate with a tiramisu cake with a candle for my mum to celebrate her birthday, a very nice touch I thought!! I love going to restaurants where the staff are friendly and very attentive, it makes it such a nice overall experience. The price is not too bad around ÂŁ35 per person but you do get to eat alot of food and it’s a special treat!!! 🙂

PS… Still feeling stuffed!!! 🙂

Nigella’s Chocolate Brownie Bowls

6 Cavity Dessert Shell TinI love trying out new receipes especially when it comes to desserts. In Nigella’s book – Kitchen, it has got a receipe for her chocolate brownie bowls using a Wilton 6 cavity dessert shell pan which cost around ÂŁ10 – ÂŁ11. I got this tin from visiting Lincoln last year and have been tyring to seek an opportunity to use this. I finally got to use the tin last weekend as I wanted to bring something over to my parents in law’s house for dinner.

The receipe was quite easy to follow and it was an instant hit with the family. The chocolate brownie was not too sweet and partnered with vanilla ice cream, it was delicious! 🙂

Here’s the receipe and instructions from her book and I have added some of my own notes:

125g soft unsalted butter, plus some for greasing
125g cup caster sugar
1 tbsp malted milk powder (such as Horlicks)
1 tbsp best-quality cocoa powder
125ml cup boiling water, from a kettle
125ml buttermilk or runny plain yogurt
1 egg
1 tsp vanilla extract
150g cup plain flour
1/2 tsp baking soda

To serve: Ice Cream / Sprinkles / Sauces / Whipped cream and fruits / what ever you fancy! 🙂

Preheat the oven to 200 (GM6) and lightly butter the indentations in a 6-hole muffin tin.

Melt the butter in a thick-bottomed saucepan over a low heat; add the sugar, stirring with a wooden spoon to help it dissolve into the butter. Turn off the heat. Make sure to use a big saucepan as all the ingredients will end up in this saucepan. The mixture becomes quite thick.

Put the malted milk powder and cocoa into a measuring jug and whisk in the boiling water until smooth. Add this liquid to the warm pan of butter and sugar, stirring to combine with a wooden spoon.

To the emptied-out jug (no need to wash out) add the buttermilk (or yogurt), egg and vanilla and whisk together before stirring this mixture into the pan, too.

Finally, whisk in the flour, baking soda and, using a ladle for ease, fill the 6 bowl indentations. You will have enough mixture to fill them three-quarters of the way up, which is what you want. I still had some more mixture, enough for 2 extra. I baked twice as there are 11 of us and it will not go down too well if i didn’t have enough!  

Place in the preheated oven for about 12 – 15 minutes. When they’re cooked (they will feel gently bouncy if you press on the surface), sit the tin on a wire rack for 5 minutes before turning out the little brownie bowls. I just put the tin upside down and tap them and the brownies fell out. If they do get stuck, just tap abit harder and they will fall! Fill while still just warm or when cooled, as desired.

Make ahead note: The bowls can be baked up to 1 day ahead and stored in airtight container, layered with baking parchment. Reheat in warm oven for 5-8 minutes before serving.

The bowls can be frozen in airtight container, layered with baking parchment, for up to 2 months. Defrost for 3-4 hours on wire rack at room temperature and reheat as above.

To me, they taste like chocolate cake rather than a brownie quality and I guess that you can use the tin for other types of cakes!! When I find them, I will post them up!

Brownie Mixture

Brownie Mixture

Into the oven

Baked Brownie Bowls

Baked Brownie Bowls

Brownie Bowls - Cooling

Brownie Bowls – Cooling

Nigella's Chocolate Brownie Bowl

Nigella’s Chocolate Brownie Bowl